
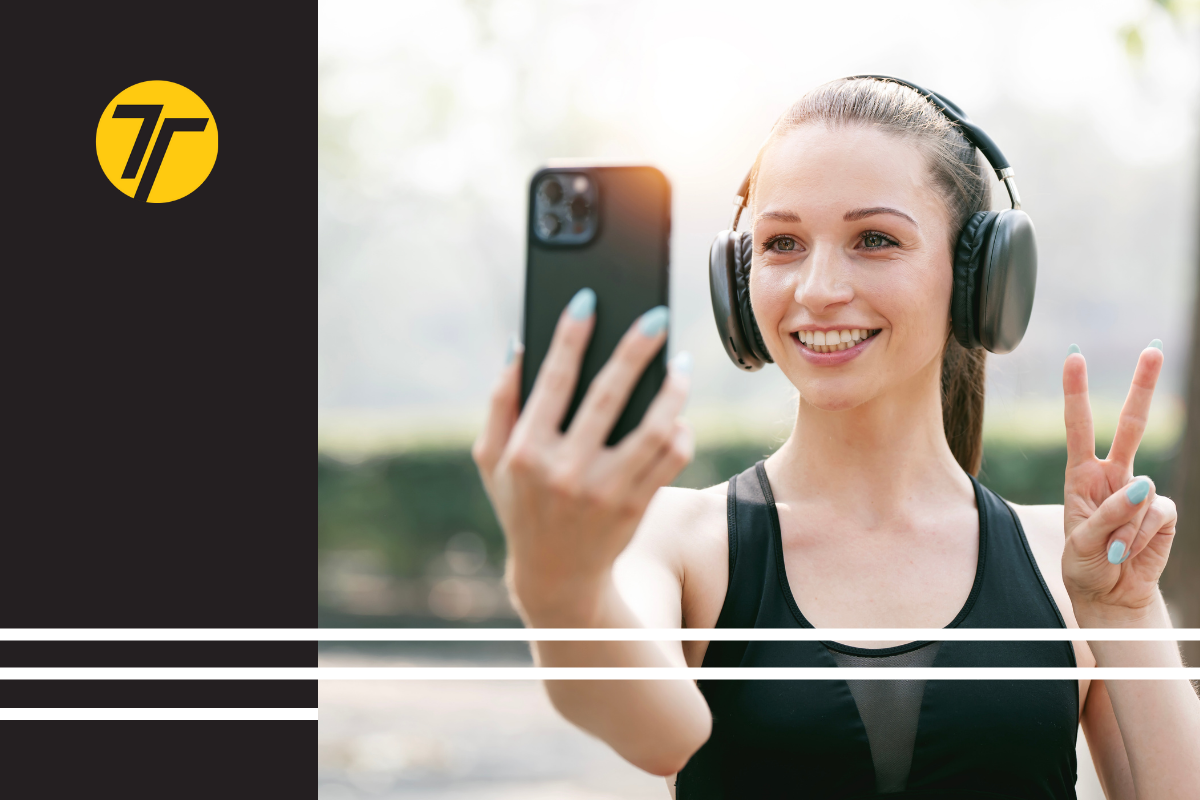
The iPhone 15, 16, and 17 Pro models now shoot at a quality that rivals traditional cameras for most fitness use cases: sharp 48-MP photos, cleaner low-light performance for gyms, stronger stabilization for movement demos, and noticeably better onboard microphones.
But what makes iPhone’s fitness photography or video features unbeatable is accessibility. It’s the camera you already carry, with no learning curve, and instant editing tools. Add to it some accessories, such as a simple tripod, a light, and a clean background, and you’ve got your own shooting studio.
For personal trainers running hybrid or online businesses, all of this matters. Your phone augments your marketing team of one and can store client progress, habits, workouts, and lifestyle shots. In this guide, we’ll list the best iPhone camera settings for trainers and how to get professional results without buying new equipment.
Table of Contents
- How to Use Your iPhone Camera for Marketing: 5 Key Features to Know
- 4 Pro Tips for iPhone Fitness Content Creation
- 4 Advanced iPhone Tactics & Where to Use Them: Fitness Content Edition
- New iPhone Camera iOS 26 Photo Features: Machine-Learning and Apple Intelligence Features
- Fitness Video Marketing: Workflow & Content Strategy
- 5 Top Do’s & Don’ts for Personal Trainers When Shooting Content with iPhone
- Conclusion
How to Use Your iPhone Camera for Marketing: 5 Key Features to Know
#1: Photographic Styles
To get a consistent look across all your posts, you must go into the camera settings, select a photographic style like ‘Vibrant’ or ‘Rich Contrast,’ and use it every time you shoot.
For a high-energy brand, choose the Vibrant style; it automatically makes the colors in your gym equipment and workout clothes look punchy and appealing.
#2: ProRAW & Resolution Control
Only use ProRAW for social media when taking high-stakes photos, like your professional headshot or a client’s final transformation picture, that you plan to edit heavily in a separate app.
For your everyday videos and posts, just use the standard camera setting. This saves a lot of storage space and is fast enough for social media.
#3: Night Mode
To take clear photos in a dark gym, put your iPhone on a tripod or stable surface and wait for the yellow Night Mode icon to appear.
You need to hold the phone steady while the timer counts down so the final picture is sharp, not blurry.
#4: Portrait Mode & Depth Control
To make yourself or a client look professional, switch to Portrait Mode before taking a photo; this instantly blurs the background so all the focus is on the person.
You can control how blurry the background is. Tap the ‘f’ icon on the screen to use Depth Control and adjust the effect until the background is soft but still recognizable as a gym.
Read More: 5 Reasons to Add Video Workouts to Your Personal Training Services
4 Pro Tips for iPhone Fitness Content Creation
Nobody gives fitness creators enough credit. Unlike lifestyle photography, fitness video content involves movement, mixed lighting, and busy gym backgrounds, which is why iPhone content creation for fitness coaches requires a different approach.
Here’s how to shoot clean, professional visuals using features already built into the newest iPhone.
#1: Consistent Focus and Light for Action Shots
Always lock your focus and exposure before recording a dynamic exercise. If you don’t lock it, the phone’s autofocus will constantly hunt for a sharp spot as the subject moves, making your video look shaky and distracting.
iPhone Feature:
- Use the AE/AF Lock. Simply tap and hold your finger on the main point of interest (such as your face or the weight you are lifting) until you see the yellow box and the text “AE/AF Lock” appear at the top of the screen. This ensures crisp focus and steady light throughout the action.
#2: Reducing Motion Blur in Stills and Video
Any slight camera movement will create blur, which ruins the sharpness of a great action photo.
iPhone Features:
- To shoot without touching the screen: Place your iPhone on a tripod and use the volume buttons on your wired headphones or the phone’s volume button to trigger the shutter.
- For timed shots (like a perfect jump photo): Use the built-in Timer (3s or 10s) to give yourself time to get into the shot without touching the screen at the crucial moment.
#3: Dealing with Tricky Lighting
Exposure Compensation (EV compensation) lets you manually override the camera’s brightness judgment, which is necessary when bright windows or harsh overhead lights confuse the sensor.
iPhone Features:
- Fixing a Dark Subject: If your subject is dark because of a bright background (like a window), tap the screen, then drag the little sun icon that appears next to the focus box up slightly to brighten the subject.
- Fixing Overexposure: If the bright gym lights are blowing out details (too much white), drag the sun icon down slightly to darken the image and bring back detail and contrast.
#4: Composition for Dynamic Angles
This one can become very handy. You can use classic composition rules to make your photos and videos more professional.
iPhone Features:
- Rule of Thirds: Go to Settings > Camera and turn on Grid. Align your subject (like your eyes in a headshot or a barbell in a lift) along one of the grid lines or at an intersection; this is more dynamic than always centering the action.
- Dynamic Angles: Never zoom in (it reduces quality); instead, physically move your phone. Shoot from low angles (shooting up from the floor) to make you or your client look more dominant and heroic.
- Movement Framing: If a client is moving (running, jumping), make sure you leave open space in front of them in the frame so the viewer’s eye can follow their direction, and the shot feels dynamic rather than crowded.
4 Advanced iPhone Tactics & Where to Use Them: Fitness Content Edition
#1: Shutter Speed (Exposure Time)
- What it means: This setting controls how long the camera’s sensor is exposed to light; it is essential for managing motion blur in your videos.
- When to use it: You must manually set the Shutter Speed to be double your video frame rate (e.g., if you shoot at 30 frames per second, set the shutter speed to 1/60 of a second) to give your videos that smooth, professional, cinematic look.
- How it helps your video marketing: This prevents fast movements, like jumping or a kettlebell swing, from looking choppy or too sharp, giving your workout demos a high-quality appearance.
#2: ISO Control (Digital Sensitivity)
- What it means: ISO controls the camera’s digital sensitivity to light; a higher number makes the image brighter but also adds graininess (called “noise”).
- When to use it: You should always aim to use the lowest ISO number possible (like ISO 25 or 50) when the light is good, as this gives you the cleanest, sharpest image with the least grain.
- How it helps your video marketing: If you film in a dark gym, you may need to increase the ISO, but keep it under 1000 to ensure your client’s face and skin tones look clean and professional, not noisy.
#3: White Balance (Color Temperature)
- What it means: White Balance controls the color cast of your image, ensuring that white objects actually look white and correcting for the yellowish light of gym bulbs or the bluish light of a window.
- When to use it: You must manually adjust this whenever you move locations (e.g., from a sunny outdoor workout to an indoor gym) to ensure a consistent look.
- How it helps your marketing: Set the White Balance manually to make your skin look healthy and natural, and ensure your branded workout clothes or equipment look the correct color in every piece of content you post.
#4: EV Dial (Exposure Value Compensation)
- What it means: This is a dial you can manually turn (like on a physical camera) to make the entire scene immediately brighter (positive EV) or darker (negative EV).
- When to use it: Use the EV Dial for quick adjustments when shooting in a difficult environment, such as a client wearing a white shirt against a dark background, which can confuse the camera’s automatic exposure settings.
- How it helps your marketing: If the auto setting makes your subject too dark, quickly dial the EV to a positive number (like +0.3) to add light, ensuring your client’s results are clearly visible and flattering.
Check Out: A Quickstart Guide to Creating Custom Exercise Videos
New iPhone Camera iOS 26 Photo Features: Machine-Learning and Apple Intelligence Features
AI for Better Framing & Object/Text Recognition
The phone’s AI can automatically identify the most important person or object in your shot, allowing for smart adjustments even before you hit record.
You can use this feature when filming yourself demonstrating an exercise from a fixed position, such as on a tripod. The AI can adjust the zoom or crop slightly to ensure you are perfectly centered according to the “Rule of Thirds.”
AI for Smart Photo Clean-Up (Generative Fill/Clean Up)
The AI can analyze an image and intelligently remove unwanted background objects, filling the space with what it thinks should be there, making the fix look seamless.
Now, if you notice a dirty towel, a random person walking by, or a stray cord, you can use the AI Clean Up Tool in the Photos app to quickly erase distracting clutter.
Choosing the Right 48MP Format
iPhone 16 Pro Max, for example, has two main 48-megapixel settings: HEIF Max and ProRAW Max, and you must choose one based on your editing plan.
- How to enable it: Go to Settings > Camera > Formats and turn on ProRAW & Resolution Control.
- When to use HEIF Max: Use HEIF Max for content you want to share quickly, as it has a small file size and the iPhone automatically applies color and brightness corrections to make it look great right out of the camera.
- When to use ProRAW Max: Use ProRAW Max only for critical photos (like website headers or print ads) that you plan to heavily edit in apps like Lightroom, because it contains massive amounts of data for unmatched control, but files are huge.
Free Resource: The Ultimate Guide to Video Coaching
Fitness Video Marketing: Workflow & Content Strategy
Mobile content creation for gyms and personal trainers works best when trainers batch-film exercises, behind-the-scenes clips, and progress photos in a single session on their iPhone. Think of it in three steps:
Plan Your Content Shoot (So You Don’t Waste Time)
Start by making a quick shot list of what you need to film. This helps you stay organized and makes sure you capture more than one type of content in a single session. Every shoot will end up being:
- Short-form videos (Reels, TikTok, Trainerize clips): These highlight movement, coaching cues, or exercise technique.
- Photos (headshots, progress shots, transformations, lifestyle images): These build trust, showcase client results, and provide evergreen content for your website or offers.
- Behind-the-scenes moments: These show personality and make your brand feel human.
Pro tip: Write every idea in the Notes app and follow it like a checklist.
Check Out: Creating Better On-Demand Fitness Content: A Step-by-Step Guide
Editing Workflow (Light Edits vs. Advanced Edits)
Editing can be a rabbit hole, but keep it simple by first following the tips we provided in this article. You basically have two paths, depending on time and skill.
For quick, everyday content, you can use your built-in tools more effectively.
- Photos app for trimming videos, adjusting brightness, cropping, and fixing small mistakes.
- Snapseed for quick color correction and sharpening.
- Always check the aspect ratio:
- 9:16 vertical for Reels, TikTok, Stories
- 16:9 horizontal for YouTube or website embeds
- Keep text away from the top/bottom edges; platform UI covers it.
- Use one consistent Photographic Style so your content looks branded.
This level of editing works for 80–90 percent of your content.
For polished, professional content, you can use more advanced yet amateur-friendly tools like Lightroom Mobile for high-quality editing (especially ProRAW photos) or CapCut for clean Reels, captions, music, and transitions.
Exporting & Sharing (So Your Quality Doesn’t Get Destroyed)
Social media compresses everything, which is why exporting correctly matters. Check your video export settings and make sure you’re:
- Exporting in MP4 (H.264)
- Using 30 FPS for exercises and demos
- Using 1080 × 1920 (vertical full screen) for Instagram & TikTok.
As for photos, look for these export settings:
- Use JPEG for social and ABC Trainerize uploads
- Use high-resolution JPEG or ProRAW → edited → exported for banners, ads, or print
- Keep your color style consistent across photos
Also, make sure you’re following the content delivery system settings. Within the ABC Trainerize platform, you can upload:
- MP4 video format
- Keep each clip 5–20 seconds and clear
- No shaking, zooming, or chaotic backgrounds
Once you follow these steps, your workflow becomes repeatable, and your content looks polished across every platform.
Check Out: Everything You Need to Know About Using Video Marketing for Your Fitness Business
5 Top Do’s & Don’ts for Personal Trainers When Shooting Content with iPhone
DO
- Try different Photographic Styles and take a few test shots before a session.
- Use natural or directional lighting whenever possible
- Keep your framing clean and backgrounds simple
- Check your lens for smudges (fitness content gets dirty fast)
- Keep enough storage free before a shoot so your phone doesn’t choke mid-recording
DON’T
- Rely on Auto mode in gyms with mixed lighting
- Change your editing look every post — keep color consistent
- Ignore clutter or reflections (mirrors reveal everything)
- Shoot with a dirty lens or shaky hand
- Film long sessions without checking the storage or battery first
Free Resource: The Ultimate Guide to Video Coaching
Conclusion
With the iPhone 15, 16, and 17 Pro, personal trainers have everything they need in their pocket: sharp 48-MP photos, cleaner low-light performance for gyms, reliable stabilization for movement demos, and easy editing tools that make your visuals look polished without extra gear.
By learning a few core features such as consistent Photographic Styles, ProRAW for key shots, manual exposure for tricky lighting, and Portrait Mode for clean client visuals, your video content instantly looks more intentional and on-brand.
Add fitness-specific techniques like locking focus for dynamic exercises, stabilizing the phone, framing movement, and using 48MP for cropping, and your iPhone becomes a full content studio.
When you plan your shoots, edit with a simple workflow, and follow the core dos and don’ts, you can produce professional, consistent content that supports your brand, your coaching, and your business growth, all without buying a single extra camera.
Ready to pair your new content skills with powerful delivery? Try Video Coaching in ABC Trainerize and send clean, professional videos straight into your clients’ programs.